This is the beginning of my compositing module at Escape Studios. This 6 week module will focus on the 2D side of the VFX pipeline now that I have finished the 3D VFX module.
The compositing software of choice is Nuke. Nuke was initially created as the in-house compositing software for Digital Domain in 1993. It was made available for the public in for the first time in 2002 by D2 software, still overseen by Digital Domain. In 2007, the Foundry took over the development and marketing of Nuke and that has continued up until the present day.
Nuke is the most commonly used compositing software in the VFX industry, this is due to it’s node based workflow. This is much more powerful than a layer based workflow used in software such as Adobe After Effects. Nuke has remained at it’s status since it has become very familiar to the industry over the years which makes companies reluctant to use other much cheaper node based compositiors such as Fusion. However there are some smaller VFX houses that are using Fusion due to the high cost of Nuke.
I have had experience using nuke in a short compositing module last year and towards the end of the 3D project for some slight changes. Therefore I have a relatively good understanding of the common nodes before entering this module.
Starting the module
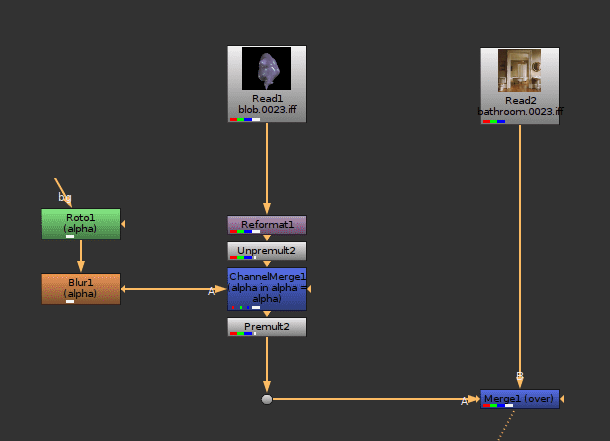
To begin this module, we looked at compositing a simple piece of CG into a static image over 46 frames. If I simply merge the two read files together there is instantly a problem. The size of the CG is not the same as the back plate and therefore it appears smaller than what it should.

To fix this I can use a reformat node after the CG read node, this automatically reformats it to the size of the back plate and therefore fixes the size issue. This is a useful node as there can often be different assets added to a script with different formats.
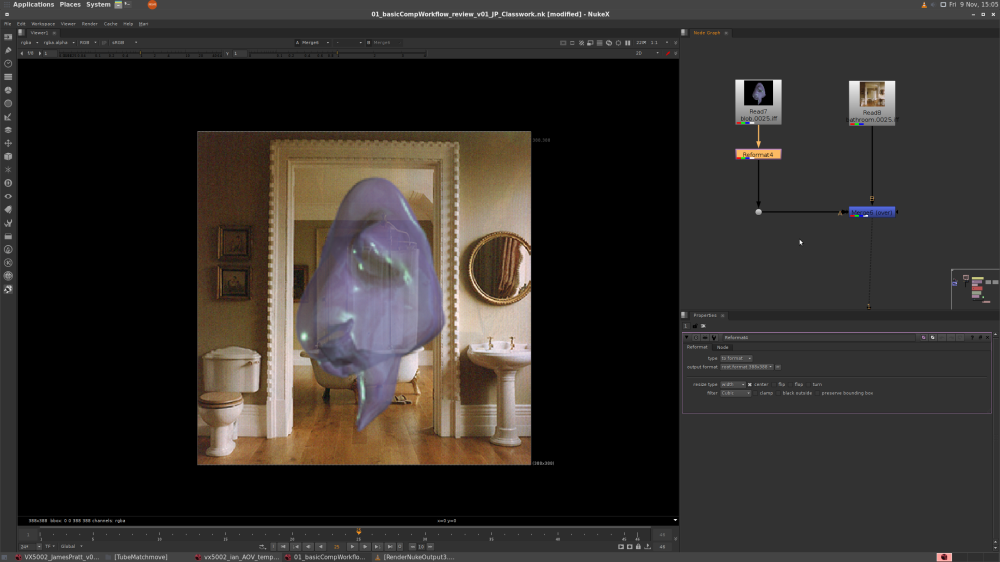
The CG blob creature is now the correct size on the back plate and animates forward correctly in the frame range. However it needs to look like it is passing behind the door and not in front of it. I will start to fix this by cutting out the doorway from the back plate using a roto node.
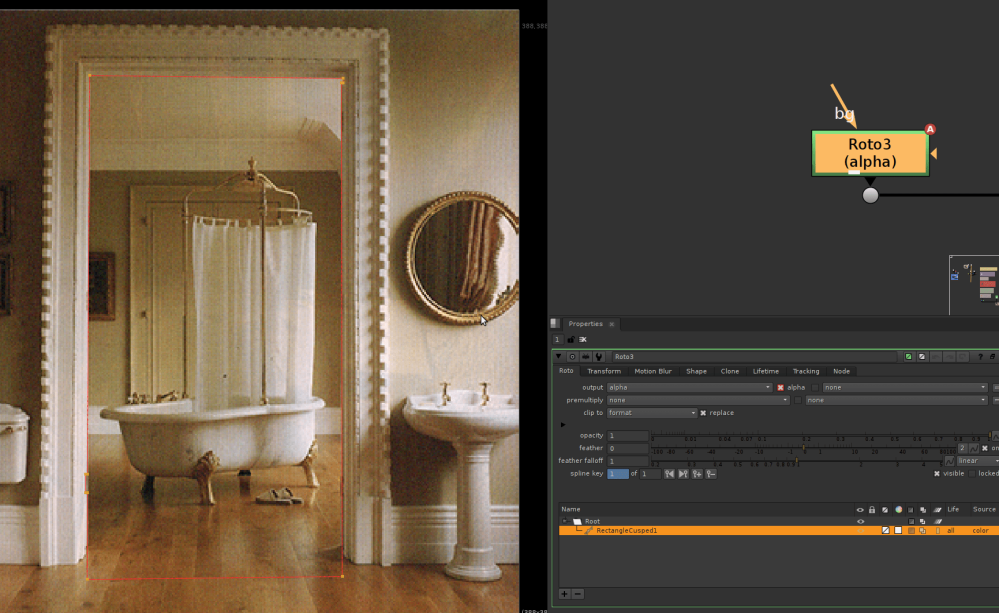
I started the roto with a cusped rectangle shape, this hepled to initially fit it to the rectangular shape of the doorway. I then ajusted the edge points further until they fit they aligned the edges better. Since there are two notches intented into the door frame, I need to add these into the roto. I can do this by pressing down Ctrl+Alt and clicking along the roto edge to add a point. I added a point at the corners of the notched areas to add them into the roto shape. By default the points created bezier corners so I pressed Shift+Z on a selected point to make it cusped again. If i wanted to change it back, I can just press Z and it will become a bezier corner again.
If I look at the alpha of the roto, there is still quite a harsh edge, so to correct this, I will use a blur node after the roto.

Now that I have the alpha for the doorway and the blob, I can merge them together using a channel merge node and feed this back into the merge node that I had earlier.
Due to the operation of the ‘over’ merge operation, I will also need to unpermult before the channel merge and premult again after it.
I will explain the unpremult and premult in it’s own blog post.